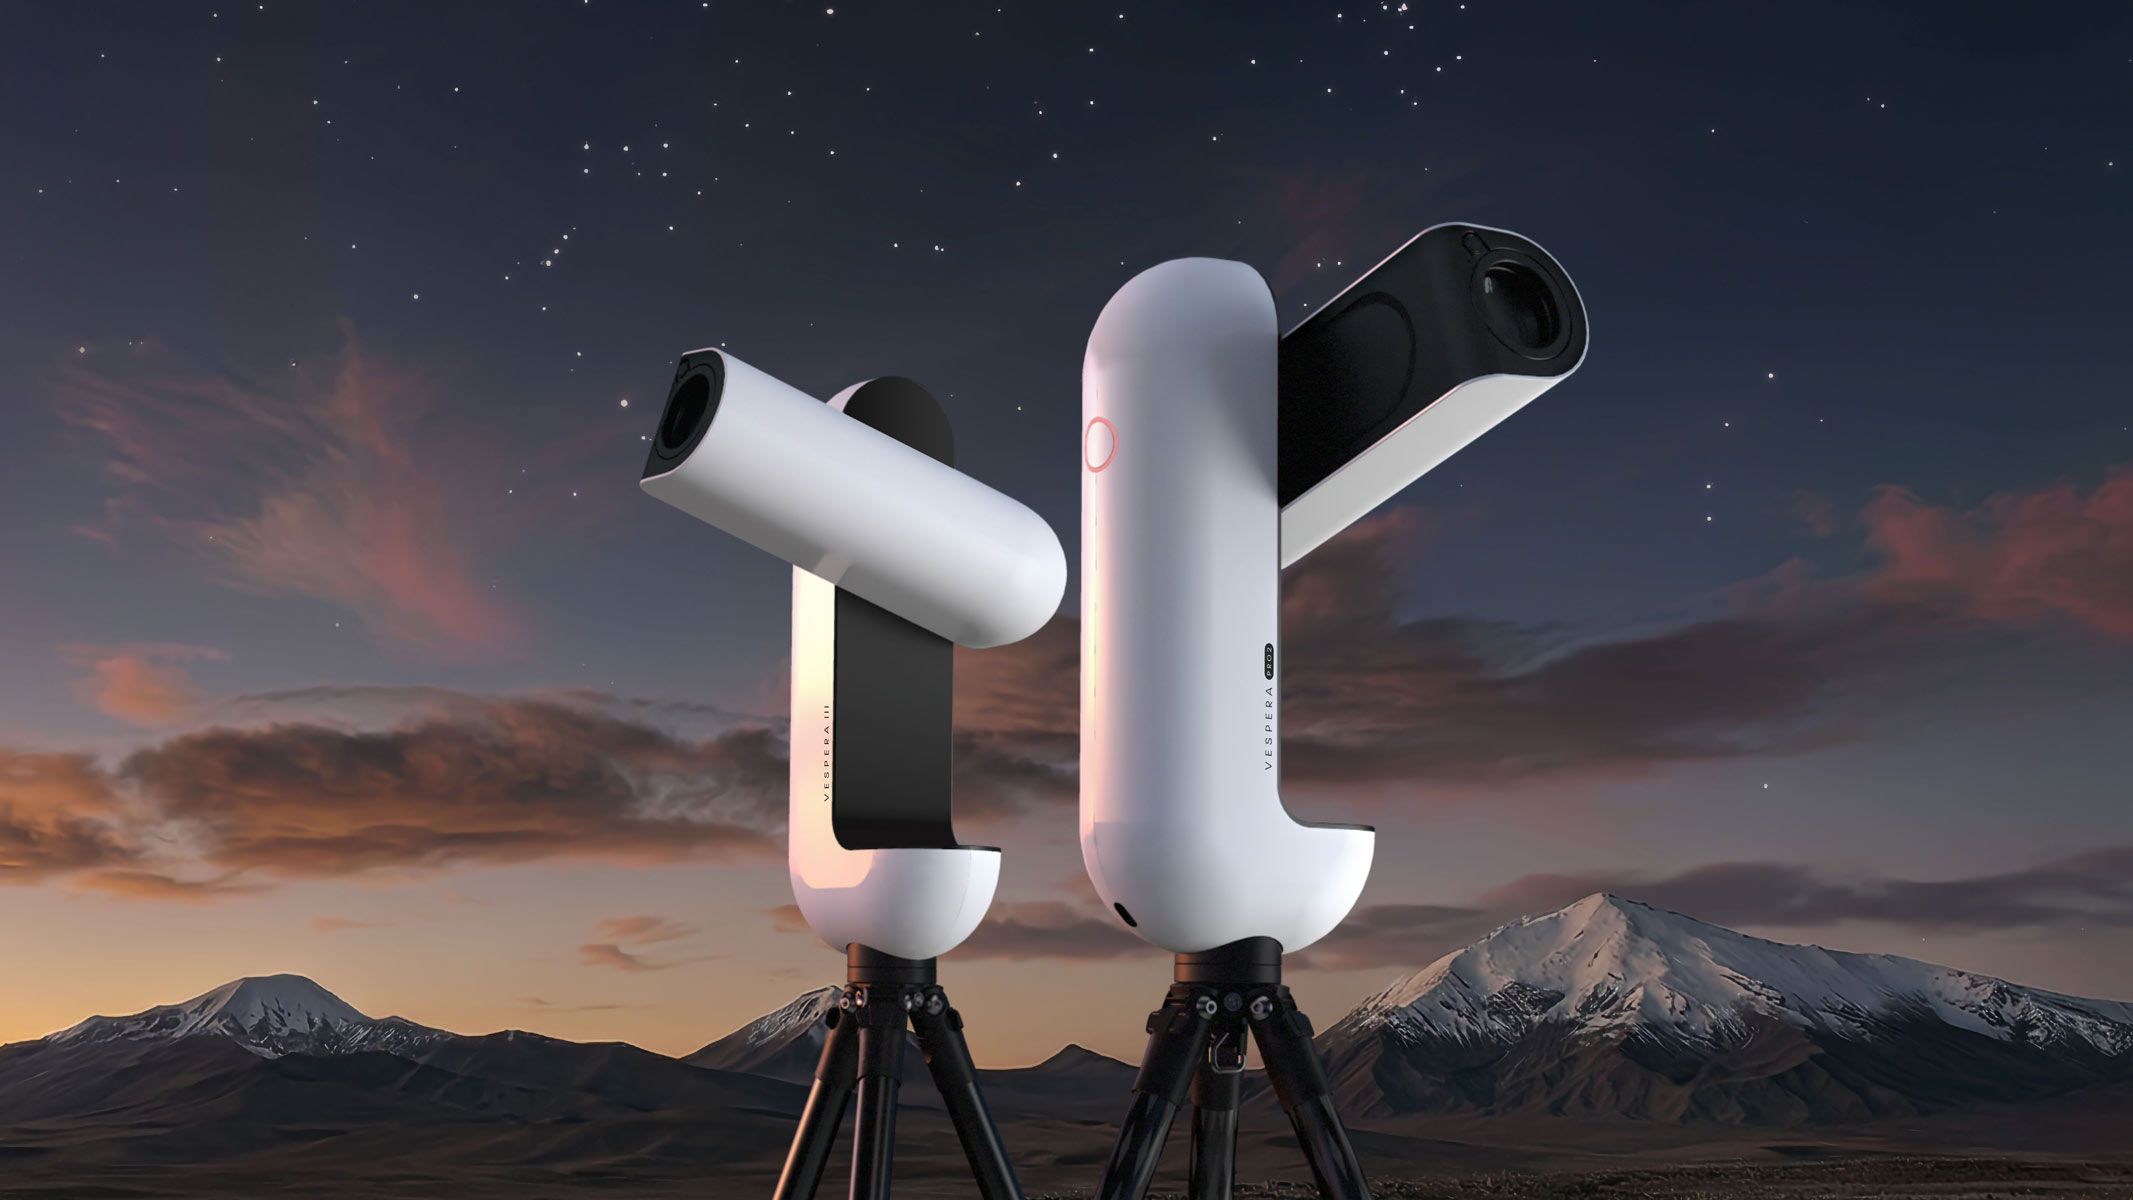
Mastering the Vaonis Vespera III and Pro 2: A Step-by-Step Guide to Ultra-Sharp Stargazing
Vaonis has done it again. With the launch of the Vespera III and Vespera Pro 2, the telescope maker introduces its sharpest optics ever. These smart telescopes combine a redesigned optical system with a host of upgraded features, making deep-sky observation easier and more detailed than before. Whether you're a seasoned astronomer or a curious beginner, this guide will walk you through everything you need to know to set up and get the most out of your new Vaonis telescope.
What You Need
- A Vaonis Vespera III or Vespera Pro 2 telescope (available now)
- A sturdy tripod (included with the telescope)
- A smartphone or tablet with the Vaonis App installed (iOS or Android)
- A clear, dark sky location away from city lights
- Optional: A power bank for extended sessions
- Optional: A pair of binoculars for initial sky scanning
Step-by-Step Guide to Achieving the Sharpest Views
Step 1: Choose the Right Model for Your Goals
Before you set up, decide which model suits your needs. The Vespera III is ideal for portable, quick sessions—it features the new optics with improved contrast and resolution, perfect for casual observers. The Vespera Pro 2 , on the other hand, adds enhanced coatings and a precision focuser for astrophotographers who demand the utmost sharpness. Both models share the same core design, but the Pro 2 offers finer detail in deep-sky objects.

Step 2: Set Up the Tripod and Mount the Telescope
Find a level spot outdoors. Extend the tripod legs fully and ensure the center column is locked. Attach the Vespera to the head using the quick-release plate—you’ll hear a click when secure. The mount is motorized and auto-levels, so manual alignment is minimal. However, double-check that the tripod is stable to avoid vibrations during observation.
Step 3: Connect to the Vaonis App
Power on the telescope (a single button press). Open the Vaonis App on your device. The app should detect the Vespera via Wi-Fi automatically. Follow the on-screen prompts to pair. If you have both the III and Pro 2, you can switch between them in the app’s device menu. Once connected, the app shows a live view from the telescope’s built-in camera.
Step 4: Calibrate the Optical System for Maximum Sharpness
This is where the new optics shine. In the app, navigate to Settings > Calibration. The telescope will perform an automated focus scan. It moves the internal lens to find the sharpest point. Wait for the confirmation message. For even finer control on the Pro 2 , you can manually adjust the electronic focuser with a slider—aim for the smallest star point visible on the screen.
Step 5: Use the New Dual-Band Filter (Pro 2 Only)
If you own the Vespera Pro 2 , it ships with an optional dual-band filter that isolates H-alpha and O-III wavelengths. To use it, slide the filter into the slot behind the objective lens (consult the manual for exact placement). This dramatically boosts contrast on emission nebulae like the Orion Nebula, making details pop without increasing exposure time.
Step 6: Select Your Target and Start Observing
Use the app’s built-in catalog to pick an object—or type a name manually. The telescope will slew and center it automatically. For the sharpest live view, tap the Auto-Stretch feature to adjust brightness and contrast. You can also enable Live Stacking , which combines consecutive frames to reduce noise—this works best with the improved optics of the Vespera III and Pro 2.
Step 7: Adjust Settings for Astrophotography (Optional)
If you want to capture images, switch to Capture Mode. Set the exposure time (recommended: 10–30 seconds per frame) and gain. The new optics reduce chromatic aberration, so you’ll get better color accuracy. For the Pro 2, you can also set a dithering interval to minimize fixed pattern noise. Save your stacks as FITS or JPG directly to your device.
Step 8: Maintain and Store Your Telescope Properly
After each session, allow the telescope to cool down to room temperature before packing. Use the included lens cap to protect the optics. Store in a dry, dust-free case. The Vespera III and Pro 2 have weather-resistant housings, but avoid leaving them in extreme conditions. Periodically clean the lens with a soft brush or compressed air to keep the sharpness intact.
Tips for the Best Experience
- Use a dark sky site—the new optics reveal fainter details, but light pollution still limits contrast.
- Let the telescope acclimate: Set it up 30 minutes before use to avoid thermal distortion.
- Update the app and firmware regularly for optimal performance and new features.
- Experiment with filters: Even on the Vespera III, a basic UHC filter can boost nebula visibility.
- Save your calibration profiles—the app remembers your focus settings for different targets.
- Join the Vaonis community online for tips on challenging objects.
With the Vespera III and Vespera Pro 2, Vaonis has truly elevated smart telescope technology. Follow these steps, and you’ll be rewarded with the sharpest, most detailed views of the universe that Vaonis has ever offered—right from your backyard.
Related Articles
- How to Decode a Hubble Space Telescope Image: A Guided Tour of Spiral Galaxy NGC 3137
- Porn on Prestigious University Sites: How Lazy Housekeeping Opens the Door
- The Squid's Secret Survival Strategy: A Step-by-Step Guide to Outlasting Extinction
- New Cambrian Fossil Site Reveals 'Alien' Early Life in Unprecedented Detail
- Artemis II Astronauts Witness First Total Solar Eclipse From Space
- GRASP: Practical Long-Horizon Planning with World Models
- Star Wars Day: Lego Unveils Ultimate Collector Series N-1 Starfighter, Free Darksaber Model with Pre-Order
- Keto Diet Emerges as Groundbreaking Treatment for Severe Mental Illness